Easy Crochet Granny Harlequin Hooded Cowl Free Pattern
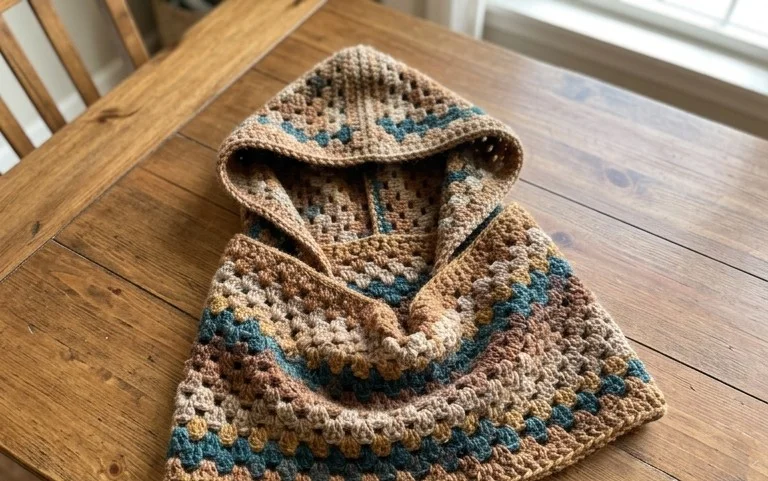
Soft wool against your neck makes this hooded cowl the accessory you will reach for on every chilly morning. The Harlequin design combines the geometric charm of traditional squares with a modern silhouette, resulting in a cozy piece that sits comfortably around your shoulders. This project suits beginners who want to move beyond simple rows and makers looking for a functional gift. You will learn to join individual squares using a continuous slip stitch technique, which keeps the fabric flexible and fluid. Building this cowl feels rewarding because each small motif connects to form a warm, wearable layer quickly.
Why You Will Love This Pattern
The Classic Crochet Granny Square is the fundamental building block for countless heirloom projects, from warm blankets to structured bags. This pattern relies on a repeating sequence of double crochet clusters and chain spaces, making it a meditative project that is easy to memorize after just a few rounds. You will enjoy how quickly the square grows, providing a satisfying sense of progress in a short amount of time. Because it utilizes small amounts of yarn for each color change, it is an ideal way to use up leftover yarn from your stash. The final result is a balanced, flat square that maintains its shape beautifully through multiple washings.
I finally mastered the granny square with this guide because the instructions for the corner spaces cleared up exactly where I kept getting lost in previous attempts.
— Sarah, beginner crocheter
Pattern Overview & Skill Level
- Skill Level: Beginner
- Approximate Time: 45 minutes per 6-inch square
- Construction: Working in joined rounds from the center outward
- Finished Dimensions & Sizing: Approximately 6 inches by 6 inches when using worsted weight yarn
Materials & Supplies Needed
- Yarn: Worsted #4 weight, 100% acrylic or wool blend, approximately 30 yards per square.
- Hook Size: 5.0 mm (US H-8)
- Notions needed: Tapestry needle for weaving in ends, sharp scissors.
- Safe yarn substitutions: You may use DK weight yarn for a smaller, more delicate square or bulky yarn for a larger, faster project. Adjusting the yarn weight will change the final dimensions, so ensure you match your hook size to the yarn label recommendation.
Stitch Guide & Abbreviations (US Terms)
- ch = chain
- st = stitch
- sl st = slip stitch
- dc = double crochet
- dc-cluster = 3 dc worked into the same space
- sp = space
- MR = magic ring (or ch 4 and join with sl st to form a ring)
Step-by-Step Pattern Instructions
Granny Square Body
- Rnd 1: Start with a MR. Ch 3 (counts as first dc), 2 dc in ring, ch 2, *3 dc in ring, ch 2; repeat from * twice more. Join with a sl st to the top of the beginning ch-3. (12 dc, 4 ch-2 spaces)
- Rnd 2: Sl st into the next two sts and into the first ch-2 corner space. Ch 3, 2 dc, ch 2, 3 dc in same corner space. *Ch 1, (3 dc, ch 2, 3 dc) in next ch-2 space; repeat from * twice more. Ch 1, join with a sl st to the top of the beginning ch-3. (24 dc, 4 ch-2 spaces, 4 ch-1 spaces)
- Rnd 3: Sl st into the next two sts and into the first ch-2 corner space. Ch 3, 2 dc, ch 2, 3 dc in same corner space. *Ch 1, 3 dc in next ch-1 space, ch 1, (3 dc, ch 2, 3 dc) in next corner space; repeat from * twice more. Ch 1, 3 dc in final ch-1 space, ch 1, join with a sl st to the top of the beginning ch-3. (36 dc, 4 ch-2 spaces, 8 ch-1 spaces)
- Rnd 4: Work in the same manner as Rnd 3, working (3 dc, ch 2, 3 dc) in each corner and 3 dc in each side ch-1 space. Ch 1 between all clusters. (48 dc, 4 ch-2 spaces, 12 ch-1 spaces)
Finishing
Fasten off your yarn, leaving a six-inch tail. Use a tapestry needle to weave the yarn tail through the back of the stitches on the reverse side of the square to secure it. If you are joining multiple squares, do not cut the yarn until you have finished all squares intended for your project or planned your layout.
Care & Washing Instructions
- Hand wash your finished item in cool water with a mild detergent to prevent fiber stretching.
- Lay the piece flat on a clean towel and reshape it to your desired dimensions while damp.
- Avoid using a tumble dryer or harsh bleaches, as these can damage the texture and color of the yarn.
Pro Tips & Common Mistakes to Avoid
- Maintain consistent tension by ensuring your dc-clusters are not pulled too tightly, which can cause the square to curl or cup.
- Place a locking stitch marker in the top of your starting ch-3 of each round to easily identify where to join your slip stitch at the end.
- Weave your ends in multiple directions within the clusters to ensure they do not pull out over time.
- To adjust the size, simply continue adding rounds following the pattern of placing corner clusters in the corners and side clusters in the chain spaces, noting that each additional round will require more yarn.
Frequently Asked Questions
Can I use a different yarn weight for this pattern?
Yes, you can use any yarn weight. Keep in mind that lighter yarns will result in a smaller square, while heavier yarns will create a larger, thicker square. Always check your yarn label for the recommended hook size.
Why does my square have wavy edges?
Wavy edges usually indicate that your tension is too loose or you are accidentally adding extra stitches in the chain spaces. Ensure you are only placing one chain stitch between the side clusters.
Is this pattern suitable for complete beginners?
This is a classic project for beginners as it teaches the most essential skills: working in rounds, creating clusters, and managing corner spaces. Practice the first two rounds several times to get comfortable with the rhythm.
Am I allowed to sell items made from this pattern?
You are welcome to sell finished items made from this pattern, but please credit the original design and use your own photographs to represent your work.
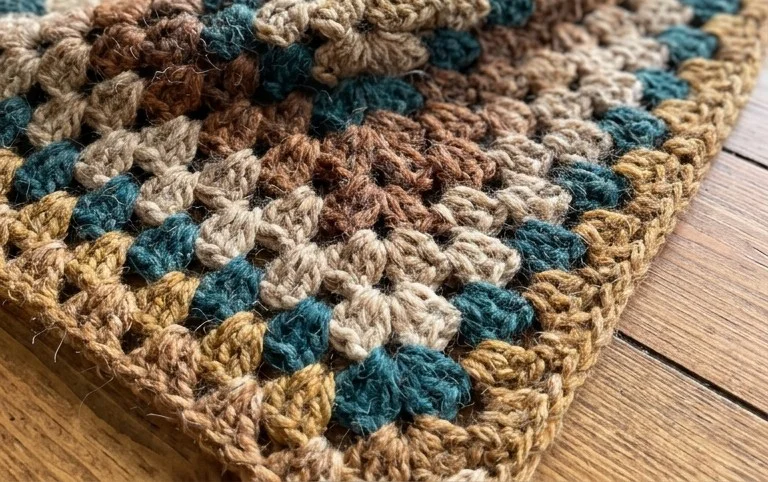
Your finished cowl creates a cozy shield against the wind while adding a touch of handmade style to your winter wardrobe. You can change the aesthetic by choosing high-contrast yarn colors to make the diamond shapes pop or use a solid neutral tone for a more subtle look. Please share your project photos on social media so others can see your color choices in action. If you enjoyed this project, check back on our blog for more free patterns to fill your weekend crochet schedule.